
How to Back Up a WordPress Website (From My Own Experience)
Today we will talk about something that is quite important for every website owner but is often neglected in favor of, in my opinion, less important things like a logo or the color of a button.
I have been working with websites since 2016 and have audited more than 300 different websites across various industries and verticals. I can honestly say that 99% of website owners have no idea how to regularly back up their websites.
And this is a huge mistake that, unfortunately, you realize you've made only when it's too late—your site is messed up, and you don't have any backup to restore it.
Here is what I have to share with you about making website backups (from personal experience).
What is the best way to back up a website?
To ensure that your website is fully protected in case of a malicious DDoS attack or if you make a mistake with your HTML or CSS code, you need to have two different backups: one at the server level and an external, independent backup stored in two different locations.
Server Level Backup
The server-level backup is easy to set up. Log in to your hosting provider and configure it to regularly back up your entire site. If you can't find this option, you can always contact a representative of the hosting company and ask about it.
For example, I often work with SiteGround (by the way, a great hosting company for small startup websites), and here's how things are done there.
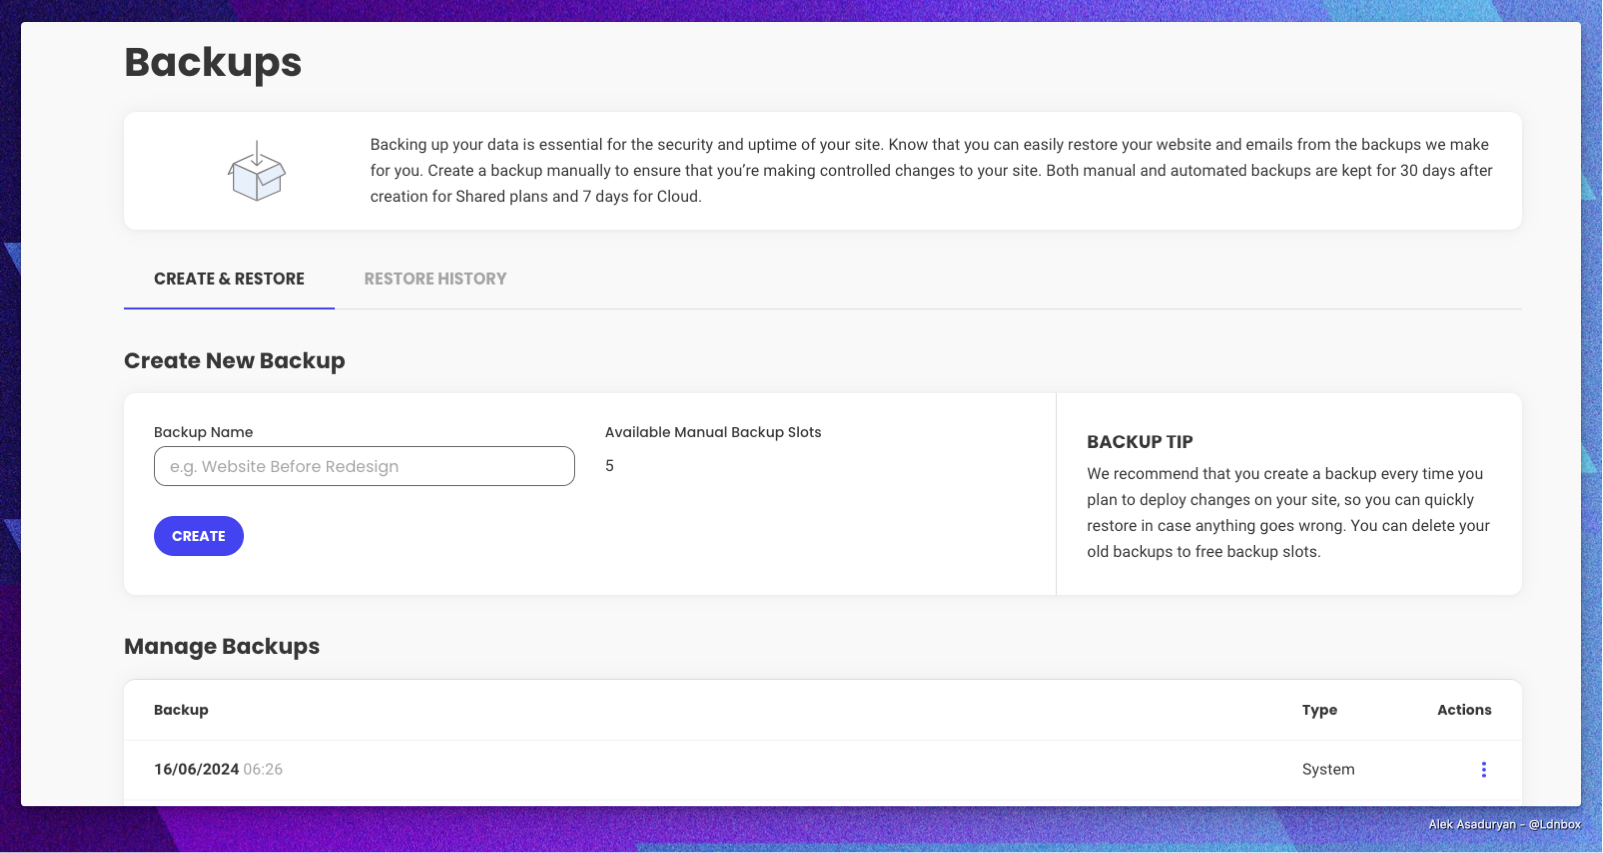
- First you go to Site Tools > Security > Backups.
- Fill in a name for your backup in the Backup Name field under the Create & Restore section.
- The backup will include all your website’s files, databases, emails and even your Staging copies.
To restore website data from a backup, you need to scroll down to Manage Backups and find the desired backup.
If you have several backups, use the backup date to find easily the backup you want to restore from.
Then click on the Actions menu and select a restore option.
Back Up Your Site Externally
This method is very important, and without it, I would say you don't have a backup if you only rely on your hosting provider.
In my opinion, the best way for external automatic downloading and saving of all your files is the UpdraftPlus plugin.
Here's a step-by-step guide on how to install and set up UpdraftPlus:
- Log in to your WordPress Dashboard:
- Go to
yourdomain.com/wp-adminand enter your login credentials.
- Navigate to the Plugins section:
- In the left-hand menu, click on “Plugins” and then “Add New.”
- Search for UpdraftPlus:
- In the search bar, type “UpdraftPlus” and press enter.
- Install UpdraftPlus:
- Find the UpdraftPlus plugin in the search results and click the “Install Now” button.
- Activate UpdraftPlus:
- Once the installation is complete, click the “Activate” button.
Setting Up UpdraftPlus
- Navigate to the UpdraftPlus settings:
In the left-hand menu, go to “Settings” and then click on “UpdraftPlus Backups.”
- Configure Backup Settings:
Click on the “Settings” tab within the UpdraftPlus page.
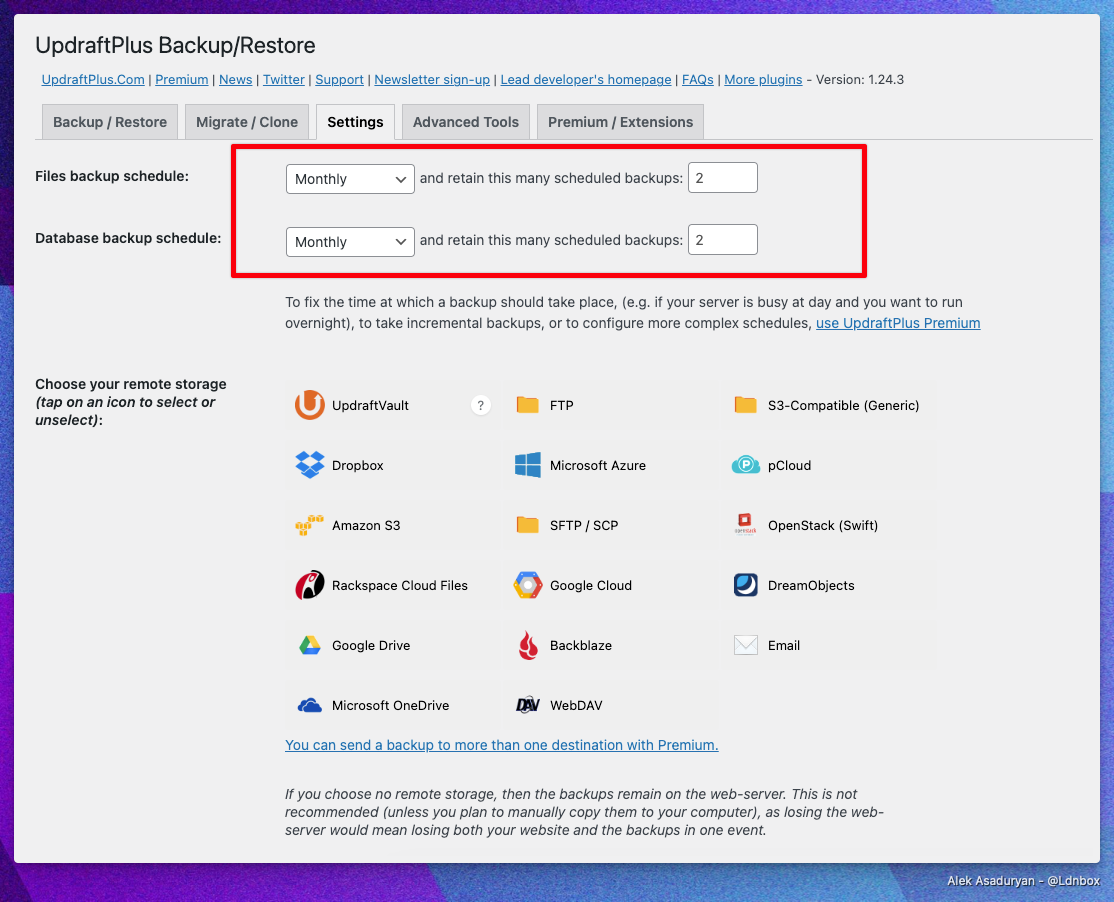
- Choose Your Backup Schedule:
Set the “Files backup schedule” and “Database backup schedule” to your preferred intervals (e.g., daily, weekly).
- Select Remote Storage:
Scroll down to the “Choose your remote storage” section.
Select the remote storage option you prefer (e.g., Google Drive, Dropbox, Amazon S3).
Follow the prompts to authenticate and link UpdraftPlus to your remote storage account.
- Save Changes:
Click the “Save Changes” button at the bottom of the page.
It is very important to save your newly created backups outside of your hosting company's servers, such as in Dropbox or Google Drive.
Creating a Backup with UpdraftPlus
- Initiate a Backup:
- Go to the “Current Status” tab.
- Click the “Backup Now” button.
- In the popup, ensure both “Include your database in the backup” and “Include your files in the backup” are checked.
- Click the “Backup Now” button.
Restoring from a Backup Created by UpdraftPlus
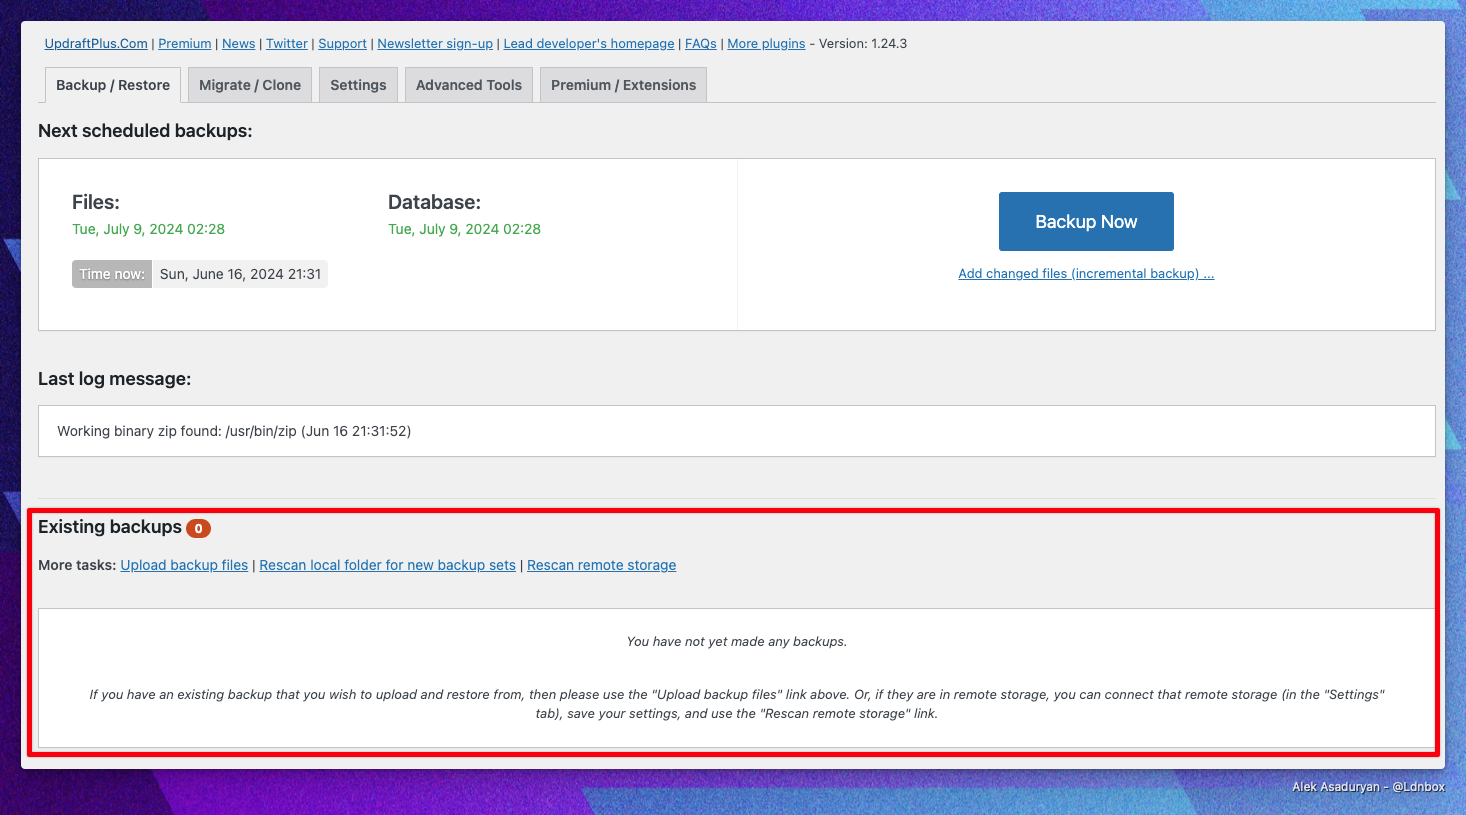
- Access Existing Backups: In the “Existing Backups” tab, you will see a list of your backups.
- Restore a Backup: Click the “Restore” button next to the backup you want to restore. Follow the prompts to complete the restoration process.
That's basically everything. It's not difficult to do, and you should be able to manage it on your own. However, if you need help, don't hesitate to contact me at hey@alek-asaduryan.com.